Tuesday's Tip - Seam Finishes
Posted by Bianca Howell on
One of the many benefits to sewing is you can make a number of items that you would otherwise buy in a store - making you self-sufficient, stylish and, of course, unique!
However, when making garments you want to make sure that your sewn pieces will withstand quite a bit of wear and tear. One way to prolong the life of your creation is to use a seam finish on the edge of the your fabric.
We have outlined below a variety of helpful techniques to finish those edges. From easy to a more involved, these finishes will add professionalism and durability to your sewn pieces.
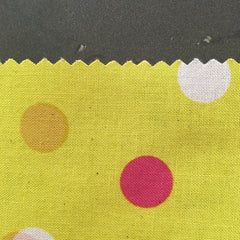
Pinked seam - Use pinking shears to trim some of the seam off near the edge of the fabric. Try not to cut off more than half your seam.
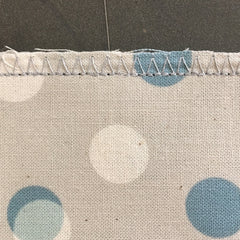
Zig Zag - Use the Zig Zag stitch or the Stitched Zig Zag stitch (also called Tricot Stitch) along the cut edge of the seam allowance.

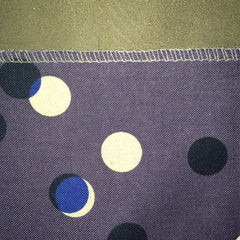
Serge - Use a Serger Machine, with 3 or 4 cones of thread, to cut and serge the raw edge of the fabric. Sergers can look intimidating (and you might hear some horror stories) but don't believe them! The serger can be a sewist's best friend (right up there with the seam ripper!) Just be sure to take some time to get to know your serger, and its mystical threading trails, before you use it on a project.
Machine Overlock - A mock serger stitch you can do on many domestic sewing machines. Check your machine manual, as a mock overlock foot is often included with all those extra doo-dads that came with your machine when you took it out of the box and said, "What the heck are all these thing-a-ma-bobs?"
Clean Finish, or Turn & Stitch - Use a slightly larger seam allowance, like 5/8" or 3/4", press open and turn under each cut edge to meet the seam stitches. Press well, stitch like you would a hem, and close to the folded edge.
French Seam - This fancy seam makes a closed-in seam on the inside of your project. Start by sewing the two fabrics wrong wides together (what?! Wrong sides?!) with a small seam allowance, like 1/4" or 3/8", and then trim to about 3/16". Press the seam allowance to one side, then press the seam well from the opposite side, and make sure the fabric opens at the stitches. Next, turn the fabric around right sides together and sew with a 1/2" seam allowance.
Flat Fell - Looks like a french seam that is stitched flat, but it's done a little differently. Sew the seam with a larger seam allowance, like 5/8" or 3/4". Press the seam open. Trim one side of the seam only, by about half. Take the untrimmed side and fold it around the trimmed side, and tuck the cut edge in to meet the stitches. Press well. Stitch like a hem, close to the folded edge.
(Please note: When using one of these finishes, you might need to add extra fabric for the larger seam allowance when cutting, if the pattern does not already call for it.)
So, next time you are needing to finish the edge of a hem try out one of these techniques. You may be adding an extra step to your process, but the outcome will be visually pleasing, will help keep those fabrics from fraying, and will increase the life of your project. Happy sewing!
Share this post
- 0 comment
- Tags: seam finishes, tuesday's tip